Author: njquintana@gmail.com

  • The Ultimate AllStar Link Deep Dive: Your Global Radio Passport 🌐📡

    Welcome to the definitive guide on AllStar Link (ASL). If you are looking for the “Gold Standard” in linking amateur radios across the globe, you’ve found it. At masonicham.net, we don’t just use the tech; we master it.

    1. What Exactly is AllStar Link?

    AllStar Link is a high-performance network of amateur radio nodes and repeaters linked via the internet. Unlike older systems that can sound scratchy or “robotic,” AllStar uses Voice over IP (VoIP) technology—the same high-fidelity tech used by major phone networks—to transmit your voice.

    The “Asterisk” Magic

    The secret sauce is a software called Asterisk. Originally built for massive corporate phone systems, a brilliant Ham named Jim Dixon (WB6NIL) adapted it for radio. He created a module called app_rpt that allows a computer to act as a radio controller. This means your radio is no longer just a “walkie-talkie”; it’s a powerful, internet-connected broadcast station.

    2. The Hardware: Building Your “All-Star” Station 🛠️

    To get started, you need more than just a radio. You need a Node. Think of a Node as your personal gateway to the world. Here is the detailed breakdown of what’s inside:

    The Brain: Raspberry Pi

    • Raspberry Pi 4 or 5: These are the current heavyweights. They have the processing power to handle high-quality audio without “jitter” or lag.
    • The OS: We use ASL3 (AllStarLink Version 3), built on the stable Debian Linux platform.

    The Interface: The “Translator”

    The computer (Pi) and the radio speak different languages. You need a USB Radio Interface (URI) to translate:

    • SHARI (SA818): A popular “All-in-One” USB stick that contains a tiny UHF or VHF radio. Perfect for talking around your house and yard.
    • External URI: If you want to connect a powerful 50-watt mobile radio or a mountain-top repeater, you use a dedicated URI cable (like those from Masters Communications) to link the Pi to the radio’s “Data” port.

    The Radio

    • Handhelds: Any analog FM radio (Baofeng, Yaesu, Icom, Kenwood) works!
    • The Beauty of Analog: You don’t need a $600 digital radio. Your 20-year-old analog rig will sound like a million bucks on AllStar.

    3. The Pro’s Cheat Sheet: Controlling the World ⌨️

    Once your node is blinking and live, you control it using your radio’s keypad (DTMF tones). Here is the “MasonicHam Master List” of commands:

    Command

    Name

    What it does

    *3 <Node #>

    Connect

    Links you to any node in the world for a 2-way talk.

    *2 <Node #>

    Monitor

    You can hear them, but they can’t hear you. Great for busy nets!

    *1 <Node #>

    Disconnect

    Hangs up the connection so you can move to the next one.

    *70

    Status

    The node “speaks” to you and lists everyone you are connected to.

    *81

    Time Check

    Gives you the exact local time—essential for logging contacts.

    4. Why AllStar Beats the Competition

    Why are we so obsessed with AllStar at masonicham.net?

    1. Audio Quality: Digital modes (DMR/D-Star) “crush” your voice into data bits, often making you sound like a robot. AllStar preserves the natural “warmth” of your voice.
    2. Zero Latency: There is almost no delay. It feels like a real-time conversation.
    3. Powerful “Hubs”: You can connect to huge rooms like HUBNet or the WIN System, where you can talk to 500+ people at once across dozens of countries.

    🎬 Coming Soon to the Video Blog!

    Reading the details is the foundation, but seeing the “Green Lights” flash is the fun part. Our upcoming video series right here on masonicham.net will feature:

    • The “First Boot” Walkthrough: Watch us flash the SD card and log into the AllStar “Cockpit” dashboard for the first time.
    • Leveling the Audio: We show you how to use the “On-Screen VU Meter” to make sure your voice is loud and clear without distorting.
    • The Global Tour: We’ll spend 10 minutes “node-hopping” across 5 continents to show you just how fast this network moves.

    Join the All-Star Roster

    This is more than a hobby; it’s global communication that YOU control. No cell towers, no big-tech algorithms—just you, your radio, and the world.

    AllStar “First Aid”: Fixing Common Node Hiccups 🛠️🚑

    You’ve built your node, you’re ready to talk to the world, but something is off. Don’t worry! Even the best All-Stars run into a “fumble” now and then. Here is how to get back in the game at masonicham.net.

    1. The “Ghost” Connection (Timed Out) 👻

    The Symptom: You try to connect to a node (like *3 <Node Number>), but your radio says nothing, or you hear “Connection Timed Out.”

    • The Fix: Port Forwarding. Your home router is like a security guard. If you haven’t told it to let AllStar traffic through, it will block the connection.
    • Action: Log into your router and forward UDP Port 4569 to the IP address of your Raspberry Pi.
    • Pro-Tip: If you’re on a public Wi-Fi or a cellular hotspot, they often block these ports. You might need a “VPN” or “Shrew” to get around it!

    2. The “Whisperer” (Quiet Audio) 🤫

    The Symptom: People tell you that you sound like you’re talking from the bottom of a well, or they can barely hear you.

    • The Fix: The SimpleUSB Tune Menu. Your node has a “digital volume knob” that needs to be dialed in.
    • Action: Log into your node’s terminal and run the command sudo simpleusb-tune-menu.
    • The Goal: Choose option 2 (Set RX Voice Level). While talking into your radio, watch the on-screen meter. You want your voice to hit between 3 KHz and 5 KHz on the scale. If it’s below 2, turn it up!

    3. The “Robot Voice” (Distorted Audio) 🤖

    The Symptom: You sound crunchy, robotic, or like you’re underwater.

    • The Fix: Check Your Levels & “Boost.”
    • Action: In that same simpleusb-tune-menu, look at Option B (Toggle RX Boost). If your audio is distorted, “Boost” is likely ON. Turn it OFF.
    • Radio Check: Make sure your handheld radio isn’t too close to the node’s antenna. This is called “RF Desense” and it makes your audio sound terrible. Move at least 10 feet away!

    4. The “Long Talker” (Node Timeout) ⏳

    The Symptom: You’re listening to a great conversation, and suddenly the node says “Node XXXX Timeout” and kicks you off.

    • The Fix: Adjust the TOT (Time Out Timer).
    • The Why: By default, AllStar nodes have a “safety switch” that cuts off the signal after 3 minutes (180,000 milliseconds) to prevent accidental interference.
    • Action: You can increase this in your rpt.conf file by changing the totime setting to a higher number (like 300,000 for 5 minutes).

    🎬 Troubleshooting Live on the Video Blog!

    Sometimes you have to see the meter move to understand it. In our upcoming masonicham.net Troubleshooting Special, we’ll show you:

    1. The “Screaming” Test: How to properly set your mic gain so you’re the clearest voice on the reflector.
    2. Router Mastery: A step-by-step look at a router’s “Port Forwarding” screen.
    3. The “Magic Reboot”: When all else fails, how to safely restart your Asterisk software without unplugging the power.

    We’ve Got Your Back!

    Amateur Radio is a journey of learning. If you get stuck, remember that every “All-Star” started exactly where you are today. Keep tinkering, keep testing, and we’ll see you on the air!

    Keep checking back at masonicham.net as we build out the most comprehensive AllStar library on the web!

    Visit our sponsors in the link ads below and find some great opportunities;

    https://shopify.pxf.io/c/6963327/1061744/13624

    https://go.pxf.io/c/6963327/3418173/45783
    https://united.elfm.net/c/6963327/302886/4704

    https://brothersdogfood.sjv.io/c/6963327/3789116/48604

  • GMRS An Introduction

    So, you’re looking to step up your radio game beyond those blister-pack walkie-talkies from the toy aisle? Welcome to the world of GMRS (General Mobile Radio Service). It’s the “Goldilocks” of personal radio: more powerful than basic consumer sets, but way less intimidating than getting a full-blown Ham radio license.

    Here is the lowdown on what makes GMRS the go-to choice for off-roaders, hikers, and emergency preppers.

    1. What Exactly is GMRS?

    GMRS is a licensed radio service operating in the UHF (Ultra High Frequency) range (462 and 467 MHz). While it shares some frequencies with the common FRS (Family Radio Service) walkie-talkies you see at big-box stores, it plays by much beefier rules.

    The Key Differences

    • Power: While FRS is limited to 2 watts, GMRS allows up to 50 watts for mobile/base stations and 5 watts for handhelds.

    • Repeaters: This is the “killer feature.” GMRS allows the use of repeaters, which can extend your range from a few miles to 50+ miles by catching your signal and re-broadcasting it from a high tower or mountain top.

    • Antennas: Unlike FRS radios (which must have fixed antennas), GMRS radios allow you to swap antennas or connect to a large one mounted on your vehicle or roof.

    2. The License: No Test Required

    One of the biggest perks of GMRS is the barrier to entry. Unlike Amateur (Ham) radio, there is no technical exam.

    • Cost: As of 2026, the FCC fee is $35.

    • Duration: The license lasts for 10 years.

    • Coverage: Your single license covers your entire immediate family. If you have it, your spouse, kids, and even extended family can use the radios under your callsign.

    3. Why People Use It

    If you’ve ever tried to use a cell phone in a remote canyon or during a massive power outage, you know that “bars” are a privilege, not a right. GMRS fills that gap:

    • Overlanding & Off-roading: Keep the convoy together even when the dust clouds are miles long.

    • Emergency Comms: A reliable way to talk to neighbors or family when the grid goes down.

    • Recreation: Perfect for coordinating on ski slopes, large campsites, or hunting trips.

    4. The Gear

    You generally have two choices when starting out:

    1. Handhelds (HT): Portable, battery-powered “walkie-talkies.” Great for hiking and spotters.

    2. Mobile Units: Radios bolted into your car or used as a base station at home. These pack the full 15–50 watts of power and usually require an external 12V power source.

    Why Every Ham Needs a GMRS License in Their Back Pocket

    We’ve all been there. You’re heading out for a family camping trip, a multi-car convoy to a Masonic Grand Lodge event, or just trying to set up a neighborhood emergency net. You reach for your HT, but then you realize: your spouse, your kids, and your non-ham brothers can’t legally touch the PTT on your 2-meter rig.

    This is where the General Mobile Radio Service (GMRS) becomes the ultimate “utility player” in your comms kit.

    What is GMRS?

    Think of GMRS as the “Pro-sumer” version of the walkie-talkies you see at the store. It operates in the UHF band (462-467 MHz), right next to the license-free FRS frequencies. But unlike FRS, GMRS gives you the “Ham-lite” experience:

    • Real Power: While FRS is stuck at 2 watts, GMRS allows up to 50 watts for mobile units and base stations.

    • The Repeater Edge: GMRS is the only other personal radio service that allows repeaters. In areas like North Jersey, a well-placed repeater can turn a 2-mile handheld range into 40 miles of clear coverage.

    • Interchangeable Antennas: You aren’t stuck with a rubber ducky. You can run a dedicated Slim Jim or a mobile mag-mount to truly get your signal out.

    The “Family Secret”

    The best part for us hams? One license covers your entire immediate family. For the cost of a few pizzas ($35 for 10 years), your spouse, children, and even parents are legally cleared to operate under your callsign. No exams, no technical hurdles—just clear, reliable communication.

    Is it a “Ham Replacement?”

    Not at all. You won’t be chasing DX or working satellites on GMRS. But for tactical, local, and family-wide comms where you need “five-nine” reliability without the barrier of a technician exam for everyone involved, it’s an unbeatable tool.

    More to come. 73 for now

    WALI249

    NJ2RQ

    Tidradio HD-8 3rd gen
  • Going Off-Grid: Building a Family Emergency Mesh Network

    While I spend a lot of time on HF and digital modes with my Yaesu rigs, I’ve recently been focusing on a project that hits much closer to home: Emergency Communications (EmComm). Specifically, I’ve been building out a home-based, off-grid mesh network to ensure my family can stay connected even if the grid goes down.

    This is my place for purchases

    https://go.pxf.io/c/6963327/3418173/45783
    #ad

    The Backbone: MeshCore

    For this project, I’ve moved into the MeshCore ecosystem. While many start with basic LoRa setups, I’m finding that MeshCore offers the reliability and routing I need for a permanent home installation.

    My current network infrastructure includes:

    • MeshCore 3 v4: My primary high-power nodes for maximum reach.

    https://amzlink.to/az0Kk4aRhlQx9

    #ad

    https://amzn.to/3OonxMT

    https://amzlink.to/az0Kk4aRhlQx9

    • MeshCore 2v3: Smaller, efficient units used to fill in the gaps and ensure total coverage around the property.

    https://amzn.to/4rbMVEa

    The “Why” Behind the Mesh

    Living in Bridgewater, we know that weather or infrastructure issues can occasionally knock out cell towers. By deploying these nodes, I’m creating a self-healing, “license-free” (but ham-improved) network. It allows for text-based messaging and GPS location sharing without needing a single cell tower or internet provider.

    Integrating with the Shack

    The beauty of this setup is how it complements my existing gear. Between the Yaesu FTM-310 in the truck and the MeshCore nodes at home, I’m building a layered approach to communications:

    1. Local: MeshCore for instant family coordination.

    2. Regional: VHF/UHF and digital modes (D-Star/DMR) via my openSPOT 4.

    3. Long Range: HF via the FT-710.

    What’s Next?

    The next step is stress-testing the range between the 3 v4 and the 2v3 units in the wooded areas around my neighborhood. I’ll be posting those range test results soon!

    Are you running MeshCore or Meshtastic? I’d love to hear about your node configurations in the comments.

    United Airlines Special Offer

    https://united.elfm.net/vPo3L3

    https://united.elfm.net/c/6963327/3790132/4704

    #ad

  • The Importance of an Elmer: A Special Thanks to NP4H and W2MSA

    The Importance of an Elmer: A Special Thanks to NP4H and W2MSA

    One of the most unique aspects of amateur radio is the tradition of the “Elmer”—a mentor who provides personal guidance and inspiration to those new to the hobby. As I celebrate my progression to Amateur Extra and the launch of this blog, I wanted to take a moment to recognize the two brothers who made it all possible.

    The Spark: Nomar (NP4H)

    My journey actually started at the Lodge. Nomar (NP4H), the ARRL Northern New Jersey Section Manager, conducted the Technician classes that first sparked my interest. Without his dedication to teaching and his encouragement to sit for that first exam in August 2025, I might still be on the sidelines. His passion for the hobby is infectious, and he truly sets the standard for leadership.

    The Guidance: Noel (W2MSA)

    Alongside Nomar, Noel (W2MSA) has been a constant source of support and technical wisdom. Whether I was studying for my General and Extra or trying to figure out the nuances of my Yaesu rigs and digital hotspots, Noel was there to help bridge the gap between “reading the book” and “understanding the airwaves.”

    Paying It Forward: The NJECT VE Team

    In just a few short months, I’ve gone from a curious student to an Amateur Extra. My goal now is to pay that mentorship forward immediately. I am proud to share that I have joined the NJECT VE Team as a Volunteer Examiner.

    It is an honor to work alongside such dedicated hams to help the next wave of operators get licensed. Between my work with the Fair Lawn Amateur Radio Club and this blog, I hope to be the same kind of resource for others that Nomar and Noel have been for me.

    To Nomar and Noel: Thank you for the “73” and for welcoming me into this incredible community.

    https://shopify.pxf.io/c/6963327/3323853/13624

  • What do You Need to start with the Mesh, tastic or core.

    Starter guide: Hardware for Meshtastic (and similar LoRa mesh)

    The best place to purchase meshtastic and or meshcore hardware is;

    Meshnology Website, the Best, see link below.

    https://go.pxf.io/3kAJAB

    Quick overview

    • Meshtastic runs on small microcontroller boards with a LoRa radio. You can build handheld chat nodes, trackers, or always-on routers with a few off-the-shelf parts.

    What every LoRa mesh node needs

    • Microcontroller board supported by the firmware (ESP32 or nRF52840 are most common)
    • LoRa transceiver (preferred: SX1262; older SX1276/78 also work)
    • Antenna matched to your regional band (433/470, 868, or 915 MHz)
    • https://go.pxf.io/rE41vd
    • Power (battery and/or USB/solar) with proper charging/power management
    • Optional: GPS (for trackers), small screen, buttons, sensors
    • Enclosure/mounting if used outdoors or as a fixed router

    Beginner-friendly hardware picks

    • Handheld/general nodes
    • LILYGO T-Beam V1.1/V1.2 (ESP32 + SX1262, 18650 holder, GPS, SMA antenna)
    • Heltec Wireless Stick V3 (ESP32-S3 + SX1262, small OLED, no GPS)
    • LILYGO T3 S3 LoRa (ESP32-S3 + SX1262, compact)
    • Ultra-low-power / BLE-centric
    • LILYGO T-Echo (nRF52840 + SX1262; very low idle draw, BLE; no Wi‑Fi; no GPS)
    • Modular/robust router builds
    • RAK WisBlock ecosystem (nRF52840 core + SX1262 LoRa module, base board, optional solar power modules and external antennas)
    • Also seen/supported
    • Heltec LoRa 32 V2 (ESP32 + SX1276—works but slightly less range than SX1262)
    • https://amzlink.to/az01ADwAH3BzH
    • Heltec Wireless Tracker (adds GPS; handy for location-focused nodes)
    • https://go.pxf.io/6yBZrQ

    Frequency and regulatory basics

    • Buy the right frequency variant for your location:
    • 915 MHz: North America, AU/NZ, much of LATAM
    • 868 MHz: EU/UK and many other regions
    • 433/470 MHz: some APAC/EMEA countries (check local rules first)
    • Configure the correct region in firmware and stay within EIRP/duty-cycle limits. Antenna gain counts toward your EIRP.

    Antennas and range tips

    • Use a quality antenna matched to your band (a quarter-wave whip is a good start).
    • Elevation matters more than raw power—put router antennas high and clear.
    • For fixed/base nodes, consider 3–8 dBi outdoor antennas and low-loss coax for long runs.
    • Weatherproof connectors and verify they’re tight; wrong/mismatched antennas crush range.

    Power options

    • Portable:
    • 18650 Li‑ion or LiPo 1200–3000 mAh
    • ESP32 builds: days to ~2 weeks depending on sleep/traffic
    • nRF52840 builds: weeks to months in low-power configs
    • Always-on/router:
    • Stable USB supply or solar + battery with a proper charge controller
    • Size panel/battery for your climate and expected airtime

    Outdoor enclosures and mounting

    • Use IP65+ polycarbonate enclosures, cable glands, and UV-stable hardware.
    • Consider a mast mount, lightning arrestor, and grounding for tall installs.
    • Keep electronics dry; a breather vent helps prevent condensation.

    Pick hardware by node role

    • Handheld/client: compact board, short whip antenna, battery, optional screen; GPS only if tracking matters.
    • Router/relay: reliable power, better antenna, good elevation; GPS not needed.
    • Bridge/gateway: any node plus a computer (e.g., Raspberry Pi or always-on PC) for MQTT/Internet bridging if desired.

    Flashing and setup

    • Meshtastic provides easy USB flashing tools for ESP32/nRF52 boards.
    • Configure via the phone app over Bluetooth or the desktop CLI.

    Budget to premium

    • Budget: Heltec Wireless Stick V3 or LILYGO T3 S3 + basic whip + USB power bank.
    • Midrange all‑in‑one: LILYGO T‑Beam (adds GPS and onboard charging).
    • Robust/permanent: RAK WisBlock stack + outdoor antenna + solar + weatherproof enclosure.

    What to decide next

    • Your region/frequency band
    • How many handhelds vs fixed routers
    • Indoor vs outdoor deployment and mounting options
    • Battery life vs size/weight trade-offs

  • Meshtastic or Meshcore

    Here’s a simple blog-style introduction to Meshtastic and MeshCore, and how they differ.

    Going off‑grid: Meshtastic vs. MeshCore
    When cell towers and Wi‑Fi disappear, mesh radios let phones and small devices pass messages hop‑by‑hop. Two names you’ll hear in that space are Meshtastic and MeshCore. They’re related ideas, but aimed at different people and use cases.

    What is Meshtastic?

    • An open-source, ready-to-use off‑grid communication system built around low‑power radios (often LoRa).
    • You buy or build small radio “nodes,” pair them to your phone, and chat, share GPS location, and send short data messages over a mesh.
    • Comes with polished firmware for popular DIY hardware and companion apps for Android, iOS, and desktop/CLI.
    • Designed for hikers, events, clubs, and emergency preparedness—simple setup, long battery life, and channel-based encrypted messaging.

    What is MeshCore?

    • A developer-focused core mesh engine/library—the plumbing behind a mesh network.
    • Provides the fundamentals like packet handling, routing, and node discovery.
    • Intended to be embedded into custom firmware or apps; you add your own UI, features, and hardware integrations.
    • Not a turnkey “app you install”; it’s a building block for making your own mesh-enabled products or experiments.

    Key differences at a glance

    • Audience:
    • Meshtastic: End users and tinkerers who want something that works today.
    • MeshCore: Developers who want to build or customize their own mesh solutions.
    • Scope:
    • Meshtastic: Full ecosystem—firmware, mobile apps, mapping/location, chat, and community support.
    • MeshCore: The core networking layer—lean, modular, and meant to be extended.
    • Hardware:
    • Meshtastic: Optimized for common low-power radio boards; documented, supported device list.
    • MeshCore: Hardware-agnostic by design; you choose radios/MCUs and integrate.
    • Setup:
    • Meshtastic: Flash a device, pair your phone, pick a channel, go.
    • MeshCore: Write code, configure your stack, and build your UX.
    • Features:
    • Meshtastic: Channels, encryption via channel keys, roles, location beacons, relay settings, and more out of the box.
    • MeshCore: Minimal core features; application features are up to you.
    • Interoperability:
    • Meshtastic-to-Meshtastic works out of the box.
    • MeshCore projects may or may not talk to Meshtastic unless they explicitly implement compatible protocols.

    Which should you choose?

    • Choose Meshtastic if you want practical off‑grid messaging today with minimal fuss—trails, events, neighborhood groups, or preparedness.
    • Choose MeshCore if you’re building something custom—special hardware, unique routing behaviors, sensor networks, or integrating mesh into an existing product.

    Can they complement each other?

    • Yes, conceptually. Meshtastic is a complete solution; MeshCore is the kind of foundation you’d use to build your own. Just remember that “mesh” is a pattern, not a single universal protocol—so compatibility isn’t automatic unless both sides implement the same message formats and crypto.
    • 73
    • NJ2RQ
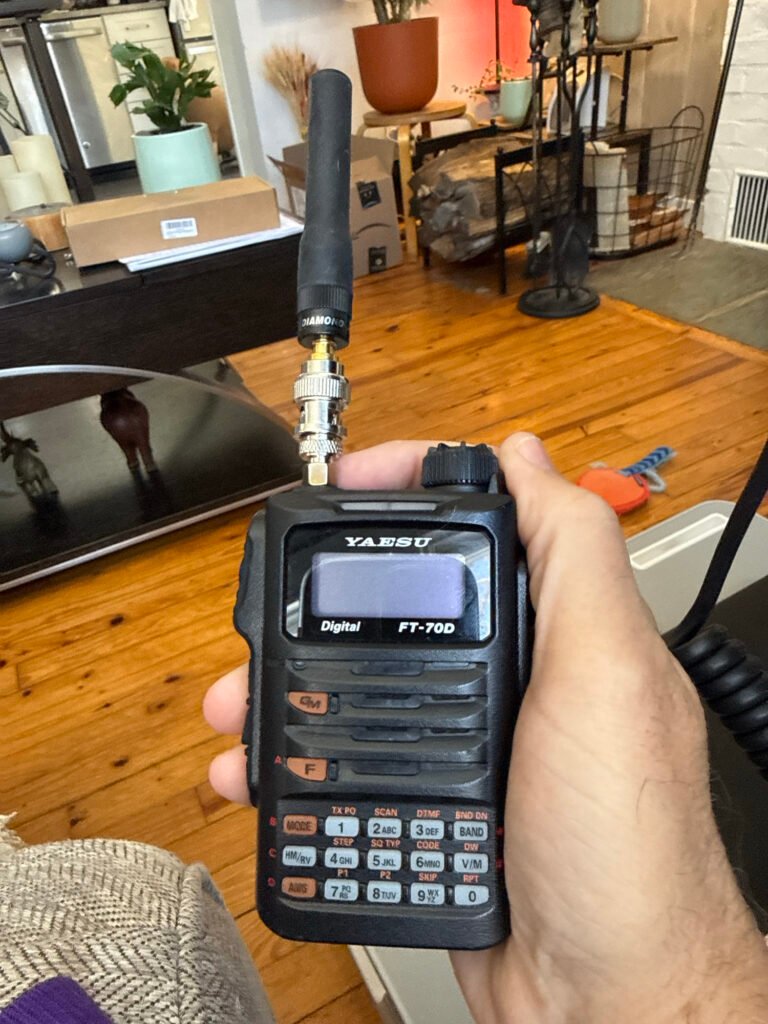
  • Bringing in my VHF/UHF antenna into the home.

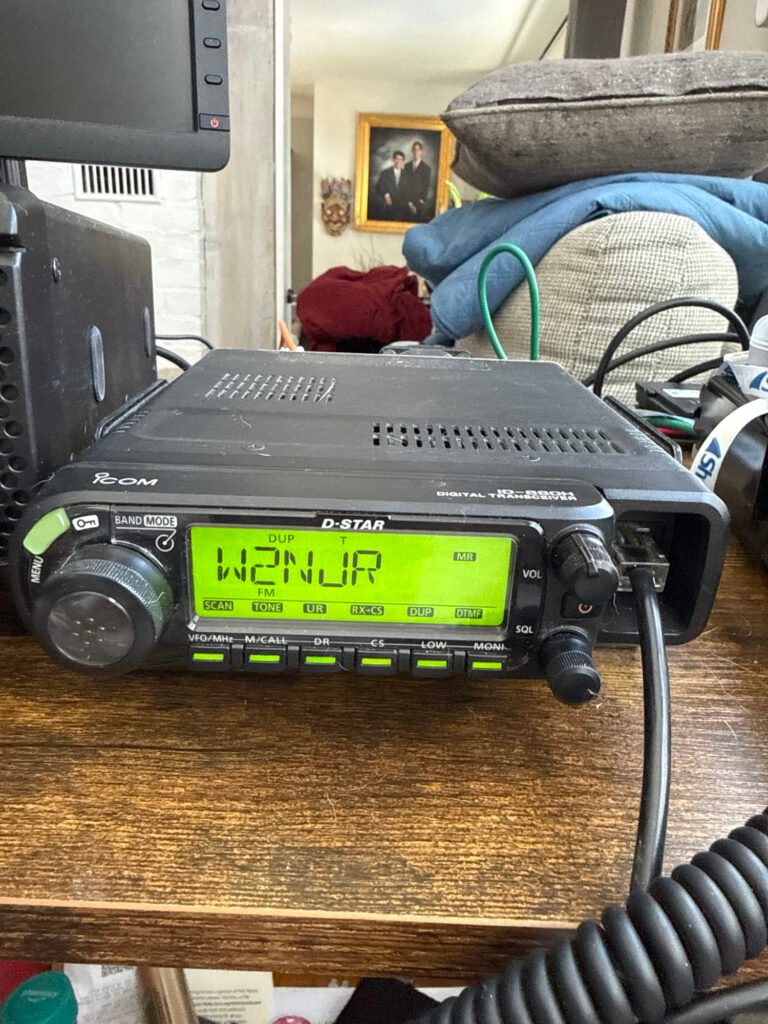
    Before I got my mobile Icom ID-880H, I used my Yaesu FT-70D for hamming.

    Icom ID-880H & Yaesu FT 70D

    I started on the airwaves with these, on VHF/UHF accessing repeaters and talking to hams all over the state and far beyond at times. Having a Tech license this was my best option. Even as I advanced in licensing, this mode of communication remains as one of my favorites and most used. From home to car, airwave access. Talking to other hams and participating in the nets is Lots of fun!

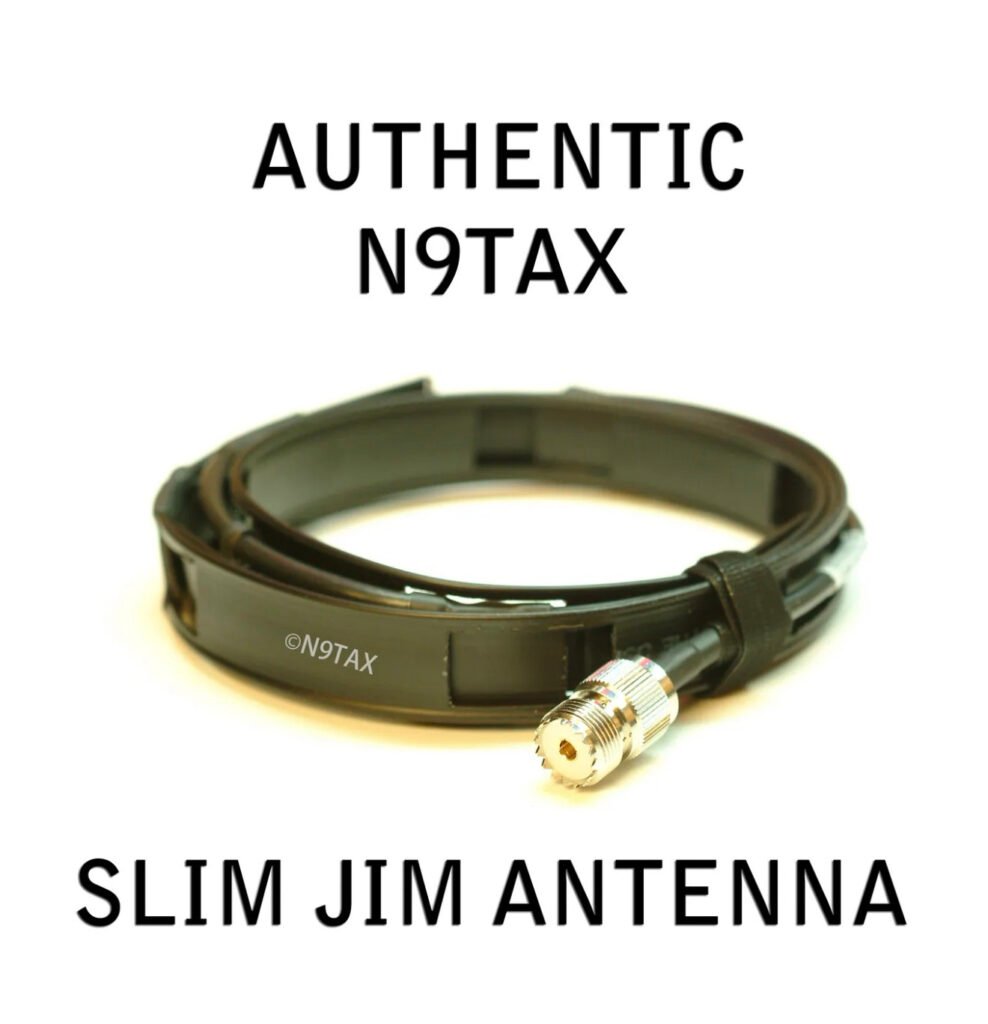
    Getting a better signal in my home was important. Here is how I did it. On a budget and it works great! I started with an inexpensive but excellent antenna,

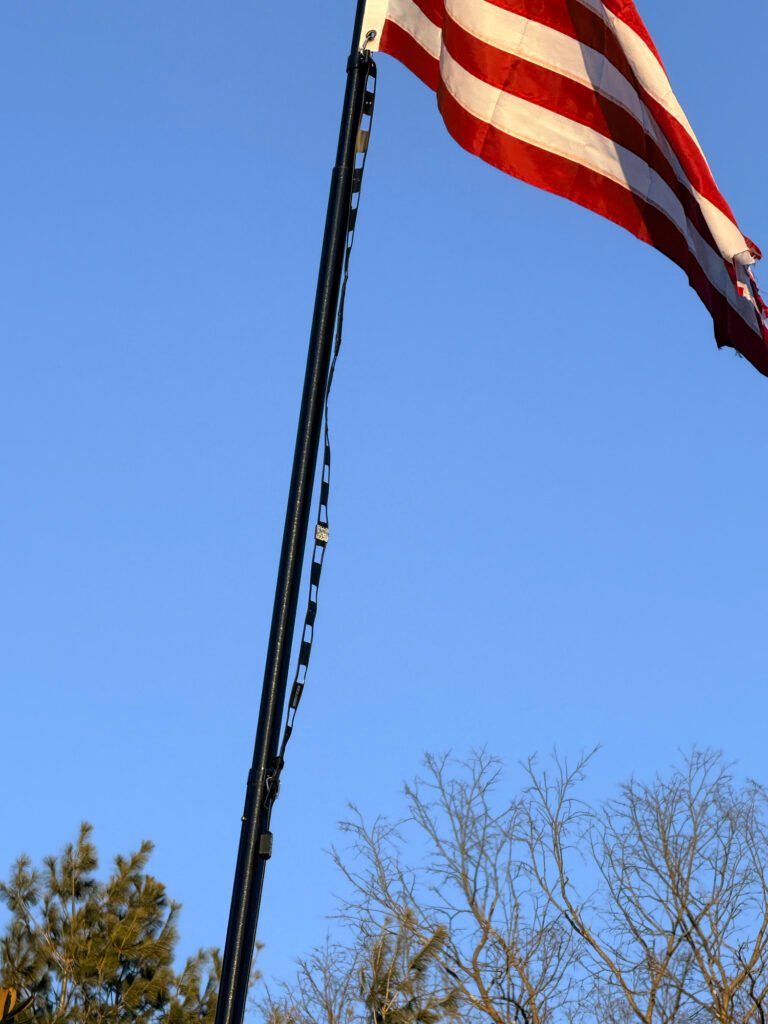
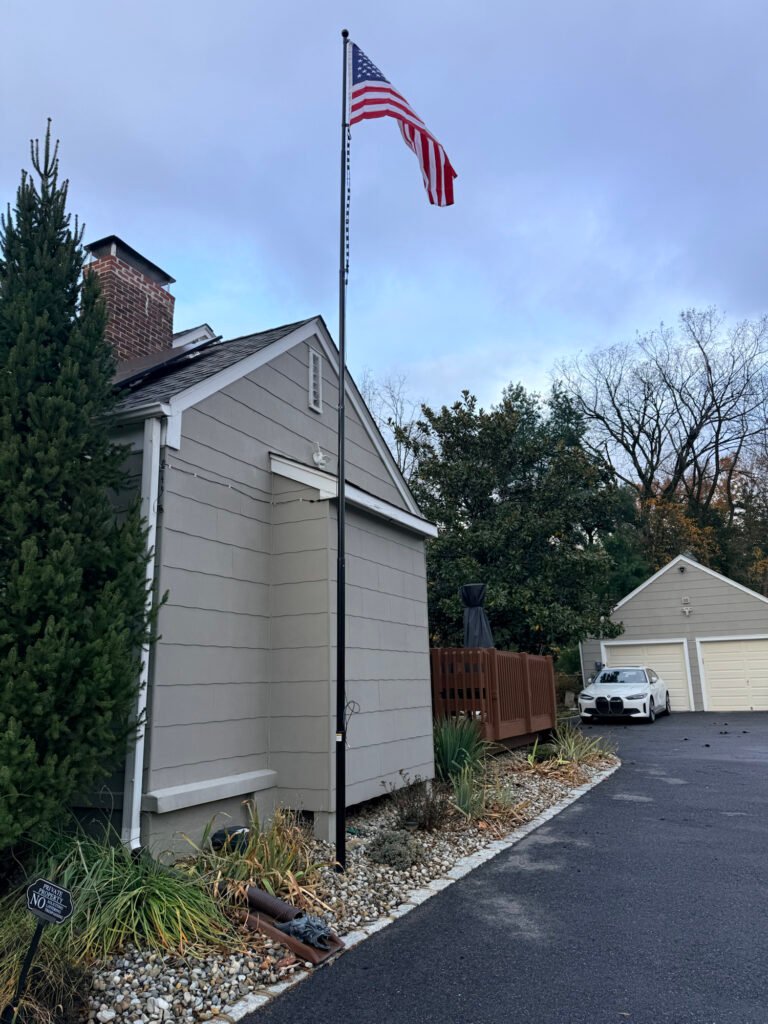
    Up on a flag pole it went, but you can place this hanging by a window, inside or outside. The higher the placement, with limited RF interference, the better the gain.

    This is my setup

    Got the flag pole from amazon,

    https://amzn.to/45Yc3Wy

    #ad

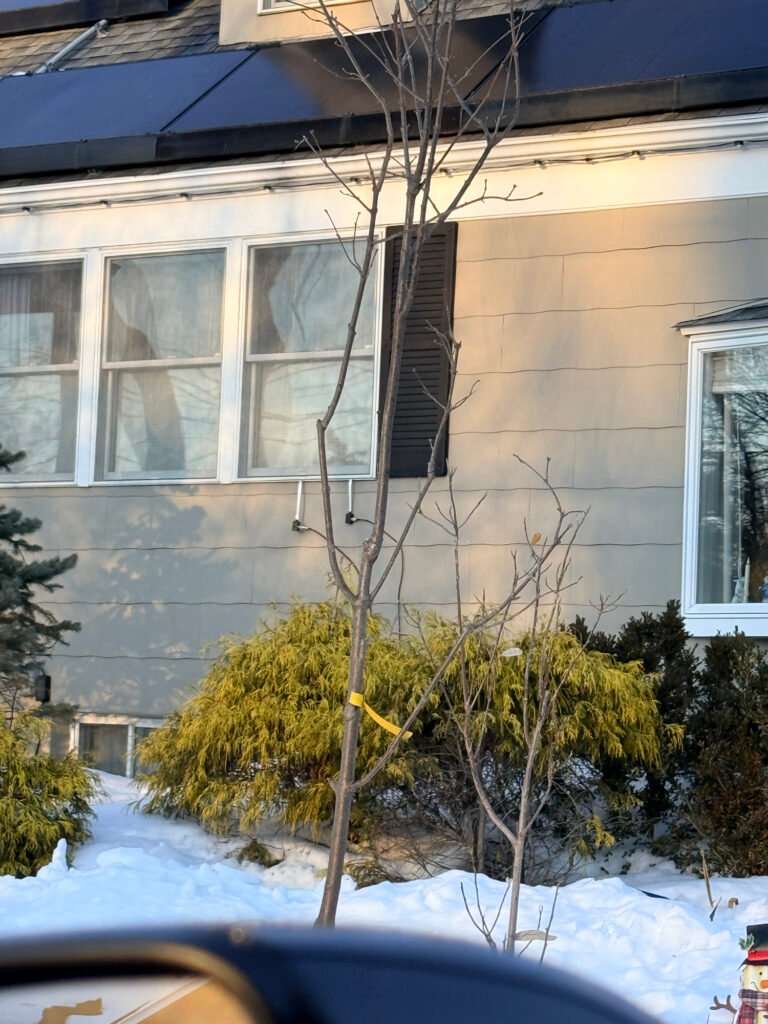
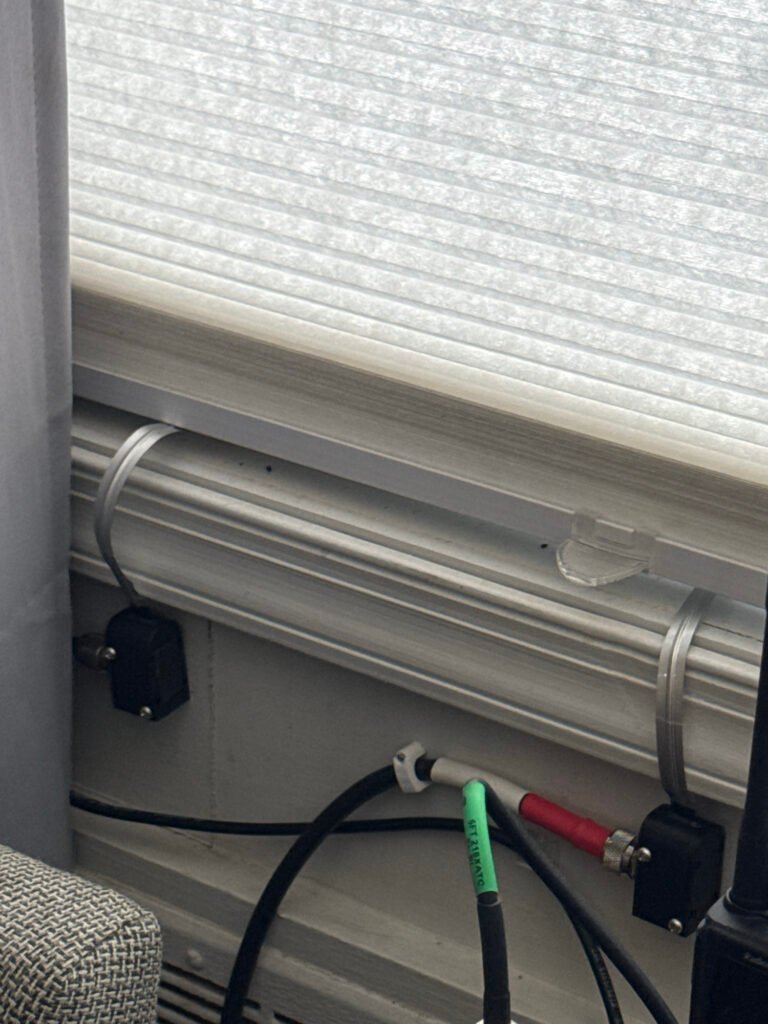
    This is a portable flagpole. I dug and filled a base with a wider steel pipe 3 ft in ground. The pole can be brought down. In a future blog I will write about the other two antennas at the top, a HF End Fed and a vertical. in the following pics you will see how the coax came into home through the window.

    Those connectors are from amazon.

    https://amzn.to/3O4tjDh

    One is HF, the other UHF/VHF

    They both come in to this

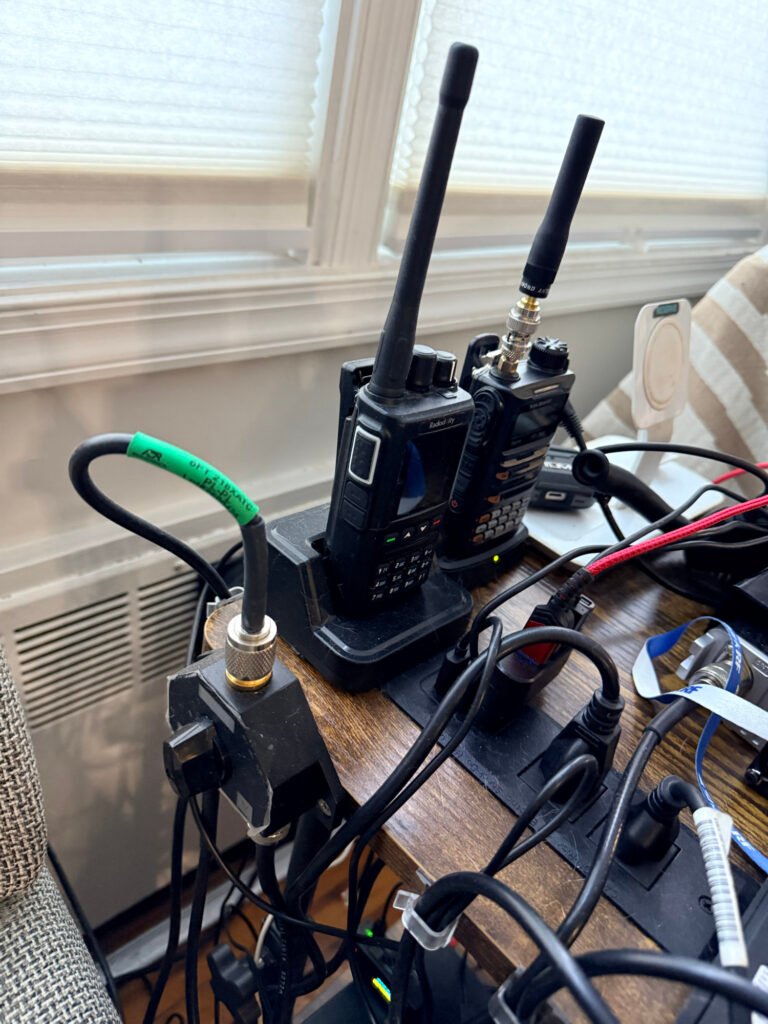
    From

    And got connected to the switch then radios
    The antenna switch is also from amazon

    https://amzn.to/4bIJsbw

    Next blogs will delve into my other projects, DMR, Meshcore, M1ke. Plus projects yet to start and on my trestleboard.

    The next blog will be on how I build and use this;

    Heltec V4 ESP32 LoRa 32 Development Board Meshtastic Kit with 3000mAh Battery Heltec V4 Case GT-800 Antenna ESP32-S3 SX1262

    27dBm OLED Display for Meshtastic WiFi loT Arduino Wireless

    Communication

    https://amzn.to/45ORhZq

    Come back often,

    73 for now

    NJ2RQ

  • How I turned my car into a mobile center (on a budget)

    One of the best things about getting my Amateur Technical license last year was finally feeling like I had a “seat at the table.” But as any ham will tell you, the license is just the ticket—the real learning happens when you key up during the daily grind.

    The Power of the W2NJR Linked System

    For those of you driving the NJ/NY corridors, the W2NJR linked system is a lifeline. Whether I’m heading into work or back home to Bridgewater, I can usually hit one of their many nodes.

    Operating a handheld device inside a car can be challenging because the metal frame acts as a shield. However, the W2NJR system is so robust that I can stay crystal clear even at low power. I usually stay on the 440 MHz (UHF) side because it handles the urban “concrete jungle” and highway travel exceptionally well.

    A Good Radio to Start With: https: Yaesu FT-70Dr

    Here on Ebay

    https://www.ebay.com/itm/112428933667?mkcid=1&mkrid=711-53200-19255-0&siteid=0&campid=5339141584&toolid=80005&mkevt=1

    #ad

    – A solid dual-bander is the perfect entry for Analogue and Digital.

    Why You Need a Dedicated Car Setup

    While the handheld is great, if you want to really “get out” there, a dedicated mobile setup is the way to go. Moving to a high-gain external antenna and a dedicated mobile rig allows you to:

    • Hear More, Talk Further: A roof-mounted antenna solves the signal loss caused by your car’s tinted windows and metal roof. Check this one out and accessories below,

    https://amzn.to/4bxbaru

    #ad

    • Handle Traffic Better: I often hear hams reporting accidents on 78 or the Parkway long before they show up on my GPS. It’s real-time intelligence from people actually on the road.

    The “Net” is Your Best Emergency Training

    I’ve made it a point to check into the evening nets. If you’re looking to be more than just a “hobbyist,” this is essential. Here’s why:

    • Emergency Preparedness: Nets are structured drills. Learning how to follow a Net Control Station (NCS) and pass traffic is exactly what we’ll need to do if cell towers go down during a major storm or emergency.

    • Sharing Knowledge: Have a question about a new antenna or an upcoming NJ hamfest? The guys on the W2NJR repeaters are a wealth of information.

    • The Masonic Connection: As a Freemason and member of Freemasons on the Air (FOTA), I appreciate the order and respect found in a well-run net. It’s a great way to meet brothers and fellow hams alike.

    Essential Commuter Accessories

    To make your mobile experience safer and more effective, I highly recommend these:

    1. Speaker Mic: Keep your eyes on the road while you talk. I highly recommend this mic. I purchased it with no regrets,

    https://amzn.to/4qhQXK4

    #ad

    2. Battery Eliminator: Handhelds are power-hungry on transmit. This keeps you at full power all the way home by plugging directly into your car’s power port. I got this one,

    https://amzn.to/4asO0S5

    #ad

    Final Thoughts

    Amateur radio is a skill that requires practice. By using my commute to work the repeaters and join the nets, I’m not just passing time—I’m staying prepared for whatever comes next.

    For car mobile antennas

    I have this Comet antenna it’s awesome, far reaching

    https://amzn.to/4bxbaru

    https://amzn.to/49Xw0PD

    https://amzn.to/4tiNY6E

    https://amzn.to/4klIXpZ

    https://amzn.to/4bCjDKa

    If you hear NJ2RQ on the air, please give me a shout!

    73,

    NJ2RQ

  • How to Get Your DMR ID: The Step-by-Step Guide

    Once you have your radio and your license, the very first “digital” task is securing your DMR ID. Think of this as your digital license plate. Without it, you can listen to the traffic, but you cannot transmit on the digital networks.

    The registration process is free, but it requires precision to avoid being rejected by the system. Here is how to do it right the first time.

    Phase 1: Obtain Your Official FCC License PDF

    RadioID.net (the central database) will not accept screenshots from QRZ or “Reference Copies” from the FCC website. You must provide the Official Copy that contains the FCC watermark.

    1. Log in to the FCC ULS License Manager using your FRN and password.

    2. Select “Download Electronic Authorizations” from the menu on the left.

    3. Choose your callsign and click “Add >” to move it to the download queue.

    4. Click “Download” and save the resulting PDF. This is the document you will upload later.

    Phase 2: Registering at RadioID.net

    This is the official clearinghouse for all amateur DMR IDs.

    1. Visit RadioID.net and navigate to Register > User Registration.

    2. Verify your Email: Enter your primary email address. You will receive a verification link immediately. You must click this link to continue the process.

    3. Submit Your Details: Fill in your name, address, and callsign exactly as they appear on your license.

    4. Upload the PDF: When prompted, upload the Official Copy PDF you downloaded from the FCC in Phase 1.

    5. The Wait: A team of volunteers manually verifies every application. It typically takes 24 to 48 hours to receive your 7-digit ID via email.

    Phase 3: Securing Your BrandMeister Account

    Once you have your 7-digit ID, you need to create a BrandMeister account. This is essential if you plan on using a hotspot.

    1. Register: Go to BrandMeister.network and create an account using your new DMR ID.

    2. Set Your Hotspot Security: Once logged in, go to “SelfCare.” You must create a Hotspot Security Password.

    3. Why this matters: This password acts as a “key” for your hotspot. Without it, your hotspot will not be allowed to connect to the BrandMeister servers.

    Pro-Tips for Success

    • One ID is Enough: You do not need a separate ID for every radio you own. Use the same 7-digit ID for your handheld, your mobile rig, and your hotspot.

    • Check Your Spam: Approval emails often get flagged as junk. If it’s been 48 hours, check your spam folder before re-applying.

    • The “Watermark” Rule: If your uploaded license says “Reference Copy” across the front, it will be rejected. Always use the “Download Electronic Authorizations” tool in the FCC portal.

  • What You Need to Get Started with DMR

    Getting on DMR is much easier than it first appears. You don’t need expensive equipment or deep technical knowledge—just a few basic pieces and a little initial setup. Once that’s done, DMR is as simple as turning a knob and pressing a button.

    1. A DMR-Capable Radio

    Not all radios support DMR, so the first requirement is a radio specifically designed for it. These come in:

    Handheld (HT) radios – great for beginners and portable use Mobile radios – higher power, ideal for vehicles or home use

    Many popular and affordable models are available, and most are capable of both DMR and analog FM, so you don’t lose any functionality by going digital.

    Here is a great starter radio on the budget:

    https://amzn.to/3M3wAlO

    https://amzn.to/3M3X1I0

    This is the one I purchased and will review in upcoming posts,

    The Radioddity GD-168

    2. A Free DMR ID

    Every DMR user has a unique DMR ID number, which acts like a digital callsign. This allows networks to identify who is talking and enables features like call routing and contact lists.

    It’s free You apply once It works worldwide

    Once assigned, your DMR ID is programmed into your radio and used automatically.

    The how to in the next post.

    3. Access to a DMR Repeater or Hotspot

    To talk beyond simple radio-to-radio range, you’ll need one of the following:

    DMR Repeater A local repeater connects you to nearby hams and to larger networks. Many areas already have excellent DMR coverage. Personal Hotspot (Optional) A hotspot is a small device that connects your radio to the internet through your home network or phone. It lets you use DMR from anywhere, even if no repeater is nearby.

    Beginners often start with repeaters and add a hotspot later.

    This link leads to a hotspot i just purchased and will be reviewing soon.

    https://amzn.to/3LMkpK4

    I purchased this one earlier and easily programed for DMR

    https://amzn.to/3ZN1MZz

    Its a great starter hotspot, easy to assemble and program. Make sure you follow the included instructions.

    4. Basic Radio Programming (Codeplug)

    DMR radios use a configuration file called a codeplug. This tells the radio:

    Your DMR ID and callsign Which repeaters to use Which talkgroups are available How channels are organized

    Most clubs, mentors, or online groups are happy to share starter codeplugs. Once loaded, daily operation is simple and intuitive.

    5. A Talkgroup to Join

    Talkgroups are the heart of DMR. They are shared conversation spaces that can be:

    Local (club or city) Statewide or regional Nationwide Worldwide

    You choose the talkgroup—your radio handles the rest. Switching talkgroups is as easy as changing channels.

    6. Internet (Indirectly)

    Unlike analog repeaters, most DMR networks use the internet to link repeaters and users together. You don’t connect directly—repeaters and hotspots do that for you—but this is what makes worldwide communication possible.

    If the internet goes down, local DMR repeaters still work just like traditional repeaters.

    What You Don’t Need

    Let’s clear up a few common worries:

    ❌ No monthly fees ❌ No special license beyond your amateur radio license ❌ No computer required once setup is complete ❌ No constant reprogramming

    Once your radio is set up, DMR becomes turn on, select, talk.

    The Best Way to Start

    Most new operators succeed fastest by:

    Starting with one radio Programming one local repeater Adding a few talkgroups Making their first contact

    From there, everything else grows naturally.

    DMR rewards curiosity, but it doesn’t demand perfection. Every operator—no matter how experienced—started with that first digital transmission. And once you hear your call sign come back from someone hundreds or thousands of miles away, you’ll understand why so many hams say:

    “This is amazing amateur radio “

    73, NJ2RQ

  • DMR for Absolute Beginners: A Friendly Introduction to Digital Radio

    If you’ve ever picked up a radio, pressed the push-to-talk button, and enjoyed the magic of being heard across town—or across the county—you already understand the heart of amateur radio. DMR (Digital Mobile Radio) builds on that familiar experience and adds clarity, flexibility, and worldwide reach, all while still feeling like radio.

    At its simplest, DMR is just talking—digitally instead of analog. Your voice is converted into digital data, sent over the air, and then reconstructed on the other end. The result is audio that stays clear even when signals are weak, background noise is reduced, and conversations sound consistent from beginning to end.

    Analog Radio: The Traditional Experience

    Analog FM is where most hams start, and for good reason—it’s simple and reliable.

    With analog:

    One conversation uses one frequency at a time As signals weaken, audio becomes noisy or distorted Anyone on the frequency hears everything Coverage is limited to the repeater or simplex range

    Analog radio feels very natural—like talking louder or quieter depending on how far away someone is. It’s easy to use, requires little setup, and remains essential for local communication and emergency use.

    DMR: The Digital Upgrade

    DMR takes that same push-to-talk experience and adds digital efficiency and smart networking.

    With DMR:

    Two conversations can happen at the same time on one frequency Audio stays clear until the signal drops out completely Conversations are organized into talkgroups You can talk locally or worldwide, by choice

    Instead of everyone hearing everything, DMR lets you choose who you want to talk to. Think of talkgroups like channels inside a channel—local club chat, statewide coordination, national calling, or worldwide discussion, all sharing the same repeater without interfering with each other.

    Simple Analogy

    Analog is like a party where everyone is in one room—you hear all conversations at once. DMR is like the same building with many rooms—you walk into the one you want.

    What About Complexity?

    DMR does require a little setup at first. Radios are programmed with a codeplug, which tells the radio which talkgroups, repeaters, and settings to use. That may sound intimidating, but once it’s done, using DMR is just as easy as analog:

    Select a channel Press PTT Talk

    Many hams find that learning DMR actually reignites the joy of experimenting—programming, troubleshooting, and understanding how digital networks work—without taking away from the fun of operating.

    Why Beginners End Up Loving DMR

    Clear audio, even in tough conditions More conversations with less interference Instant access to local and global communities A gentle introduction to digital modes

    DMR doesn’t replace analog—it complements it. Most operators use both, choosing the right tool for the moment. Analog remains perfect for simple local communication, while DMR shines when you want flexibility, reach, and control.

    For many newcomers, DMR becomes the moment when amateur radio stops feeling limited by distance—and starts feeling limitless.

  • Never Too Late to Learn: My Whirlwind Journey to NJ2RQ

    For a long time, Brother Nomar (NP4H) held technician classes at the Lodge. He always hoped I would join them someday, but I’ll be honest: I wasn’t sure my memory was up to the task. We all get a little older, and learning new things doesn’t always come as easily as it used to. I just wasn’t sure I could pull it off.

    Then, this past August, Nomar mentioned another upcoming class. Something clicked, and I finally said yes.

    The Technician Jumpstart

    The class was a two-day “cram” session with the exam on the second afternoon. To prepare, I downloaded a study app and spent time watching YouTube videos to wrap my head around the concepts. When test time came on that second day, I passed! I was in total disbelief—not only that I did it, but that I actually remembered everything I had studied.

    That same day, Nomar had invited another Brother—a state-authorized Yaesu dealer—to bring some equipment for sale. I walked out of there with a Yaesu FT-70DR. In my opinion, it’s the best little radio anyone can buy, and I strongly recommend it as a first radio (just make sure you buy through an authorized dealer!). That was the moment the passion really took hold.

    Leveling Up: The General License

    With the Technician license under my belt, I immediately set a new goal: General. I made a deal with myself—if and when I passed, I’d treat myself to the Yaesu FTDX10 (or the FTM-710).

    Shortly after passing the Tech exam, I received my official FCC email with my first call sign: KE2GPQ. I got on the air immediately, finding a deep interest in emergency communications. I started listening to the nets, specifically the W2NJR repeater system. There are so many great people on there, and it made the hobby even more fun.

    I kept up the routine—apps and YouTube—and soon enough, I passed the General exam. I snagged a great deal on my Yaesu FT-710, and suddenly, I was riding the HF waves. Making those first QSOs was an incredible rush.

    Giving Back: The Extra and Beyond

    So, what was next? I wanted to give back to the community and serve the hobby, so I decided to go all the way for my Amateur Extra license. I attained that in November, completing the trifecta in just a few months.

    Once I was an Extra, I applied for a vanity call sign to make it my own. I traded in KE2GPQ for NJ2RQ.

    That is my short history of the three licenses, bringing you up to date with my radio endeavors so far. It’s been a whirlwind, and I’m just getting started.

    73,

    NJ2RQ

  • How to Start in Amateur Radio: A Beginner’s Guide

    How to Start in Amateur Radio: A Beginner’s Guide

    Introduction to Amateur Radio

    If you’re looking for an exciting hobby that connects you with people from all around the world, amateur radio is a fantastic choice. Whether you want to talk to friends or explore the world of radio technology, this guide will help you start your journey in easy steps.

    Step 1: Understand the Basics

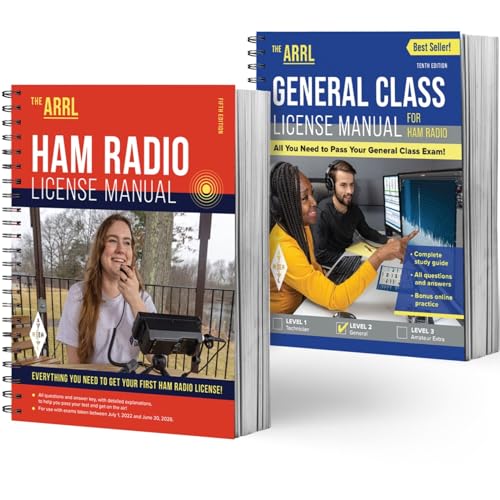
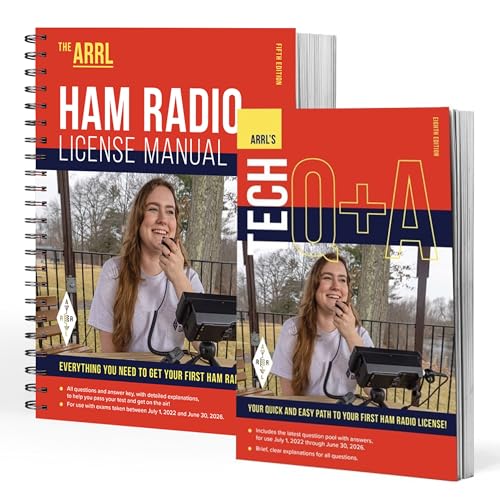
    To get started, familiarize yourself with the fundamental concepts of amateur radio. This includes learning about the different frequency bands, available equipment types, and licensing requirements in your country. Understanding these basics is key to ensuring a smooth transition into the amateur radio community. Here are some great books that can assist you in the licensing process.

    Step 2: What is Required, Licensing

    Getting licensed as an amateur radio operator is a straightforward process that begins with the Technician Class license, the entry-level gateway to the hobby. To earn it, you must pass a 35-question multiple-choice exam covering basic radio theory, regulations, and safety. Once you pass, you’ll register with the FCC to receive your official call sign. There is no longer a Morse code requirement for any U.S. license, making it more accessible than ever for new hobbyists to start transmitting on VHF and UHF bands.

    Helpful Resources & Links

    • ARRL (American Radio Relay League): As the national association for amateur radio, the ARRL is the best place to start. They offer a Step-by-Step Licensing Guide and an Exam Session Search to find a test location near you (often hosted by local clubs).
    • FCC Guidelines: The FCC regulates the service under Part 97 rules. You must obtain an FCC Registration Number (FRN) through the CORES system before taking your exam. Note that the FCC charges a $35 application fee for new licenses, payable after you pass your exam.
    • Study Tools: * ARRL Exam Review: Free online practice tests.
      • HamStudy.org: A popular, free tool for tracking your progress through the question pools.

    Quick Reference Table

    License ClassExam LengthBest For
    Technician35 QuestionsLocal communication, handheld radios, and emergency prep.
    General35 QuestionsWorldwide “DX” communication on High Frequency (HF) bands.
    Amateur Extra50 QuestionsFull access to all U.S. amateur frequencies and modes.

    Stay tuned for my personal experience, which radios I started with, and where I am in the journey at present. I will share my interests, successes, and failures (we learn from them).

    For now, wherever in the journey you may be, please share your experiences in the Facebook Group FOTA, Freemasons on the Air. https://www.facebook.com/groups/980766738227414

  • The Journey of NJ2RQ: From Technician to Amateur Extra

    Introduction to My Masonic Journey

    Welcome to the official blog of NJ2RQ! As an amateur extra and past Grand Master of Masons in New Jersey, my journey through Freemasonry and amateur radio has been transformative. Over the past four months, I have transitioned from a technician to an amateur extra license holder, marking an important milestone in my amateur radio experience.

    The Freemasons on the Air Community

    One of my exciting ventures has been the growth of the “Freemasons on the Air” (FOTA) community. This group has become a platform for Masons to share their experiences, knowledge, and passion for amateur radio. Through our collective efforts, we have fostered a welcoming environment where brothers can engage in discussions that connect ancient traditions with modern technologies.

    Continuous Learning and Fraternal Connection

    Amateur radio and Freemasonry share a unique bond that emphasizes continuous learning and mutual support. As I share my experiences and insights, I encourage fellow Masons to explore the world of amateur radio. It opens up opportunities for communication, learning, and making lasting connections across frequencies. This journey is not just about acquiring a license; it’s about building a community that values growth, knowledge, and fraternity.

    As I document my progress and the expansion of the FOTA community, I invite you to join me. Together, let’s explore the intersection of these two rich traditions and continue our journey of learning and connection.

  • Exploring the Connection Between Freemasonry and Amateur Radio

    Introduction: A Unique Journey

    Welcome to the official blog of nj2rq, where I share my personal journey from technician to Amateur Extra in just four months. As a Past Grand Master of Masons in New Jersey, I’ve experienced the rich traditions of Freemasonry and its intriguing ties to the world of amateur radio.

    The Roots of Freemasonry and Amateur Radio

    Freemasonry is an ancient fraternity grounded in symbolic traditions and values that promote personal growth and community connection. While many may not immediately see the parallels, the principles of Freemasonry resonate strongly with the ethos of amateur radio. Both emphasize communication, learning, and the sharing of knowledge. In fact, my involvement with the “Freemasons on the Air” (FOTA) community has provided a unique platform to bridge these worlds.

    Learning and Growth through FOTA

    Joining the FOTA Facebook group has been a transformative part of my amateur radio experience. Not only does it foster a space for ongoing learning, but it also cultivates fraternal bonds across the various frequencies. This community reflects the essence of Freemasonry as members support each other’s growth while sharing knowledge and expertise. Through regular interactions, I’ve found that the journey is not just about mastering technology but also about nurturing friendships and shared values.

    In conclusion, my brief journey in amateur radio has highlighted the harmonious connection between the ancient craft of Freemasonry and the modern science of amateur radio. The principles of Freemasonry continue to guide my exploration as I navigate this fascinating world, constantly learning and connecting with others.